 by
by
Tutorials on Asp.Net deployment often do either focus on Azure deployment or for a more direct Xcopy or FTP deployment. Here, I’ll try to show you how to set up Microsoft Web Deploy for easy deployment to self-hosted IIS installations. Web Deploy can be installed via the Web Platform Installer, just search for Web Deploy and make sure to install the latest version (currently 3.6).
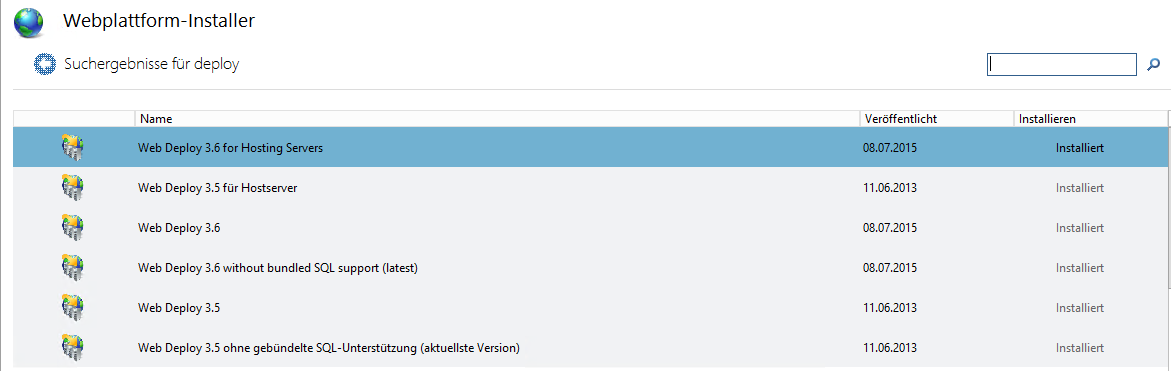
You only need the third entry in this screenshot
Alternatively, download it directly from the Microsoft Download Center.
For continuous integration scenarios, Web Deploy must be installed both on the build server (which will initiate the deployment process) as well as on the web server hosting IIS to enable inbound deployments.
Grant Deployment Rights to a Windows User
On the hosting server, you need to have a user whom you’ll grant deployment rights on a per website basis. It’s not a good idea to use the account you’re logging in with, so just create some user with minimal permissions (only Read/Write access to the targeted websites directories is required).
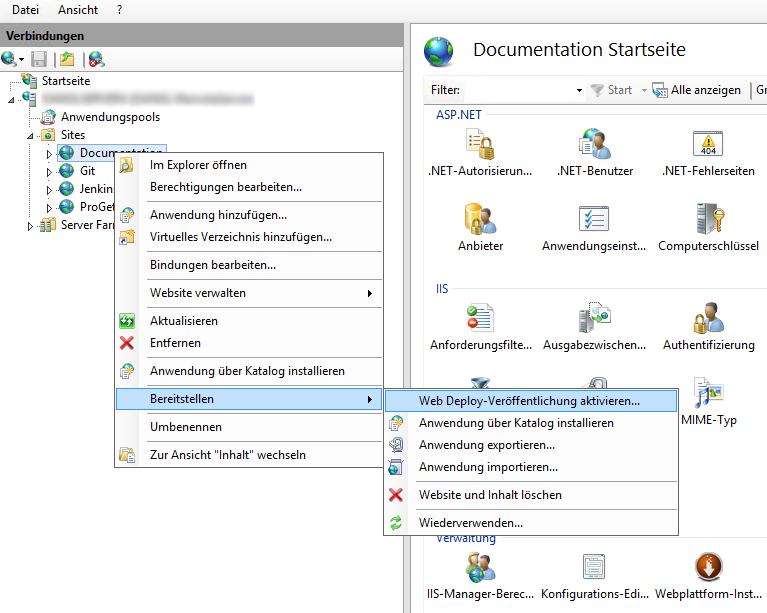
Then, in IIS, right click on your website, navigate to deployment and select Activate Web Deploy publishing.
In the following dialog, select the user whom you’ll want to grant deployment permission for that website and specify the Url for the deployment endpoint. The Url should just resolve to your server, since by default all hostnames will be accepted for the port 8172 that Web Deploy is using. Just make sure the Windows Firewall allows inbound connections on that port.
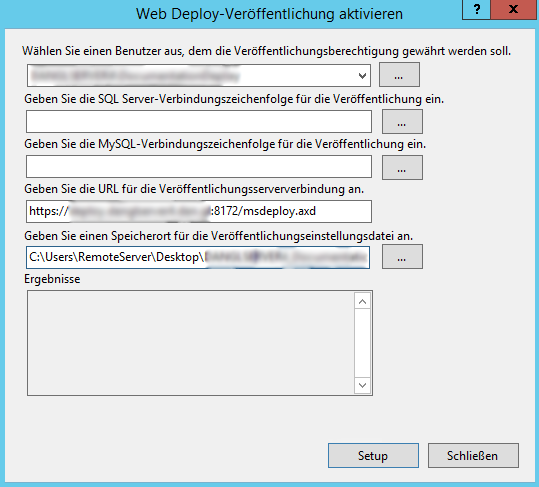
After clicking on setup, a *.PublishSettings file will be created on the directory that was specified, defaulting to the current logged in users' Desktop. For command line based deployment (or via Continuous Deployment), this file isn't needed, but when deploying from Visual Studio you should save that file somewhere for easy configuration of deployment setups. The selected user should have been automatically granted permissions for Web Deploy on the IIS server, but better check if there’s an entry for the user under IIS Manager Permissions in the server node within the Internet Information Services Manager application that specifies the selected site as Path.
Configuring SSL for the Web Deploy endpoint (IIS Management Service)
If you can, you absolutely should use TLS/SSL everywhere, especially for the endpoint you’re going to use for deploying websites. Even if you can’t get a trusted certificate (but then, StartCom issues them for free!), you should go with a self-signed one either directly from the server or from your domain root CA and trust that explicitly. It’s a really bad practice to ignore SSL errors, you should never let that catch on!
Now on how to use it:
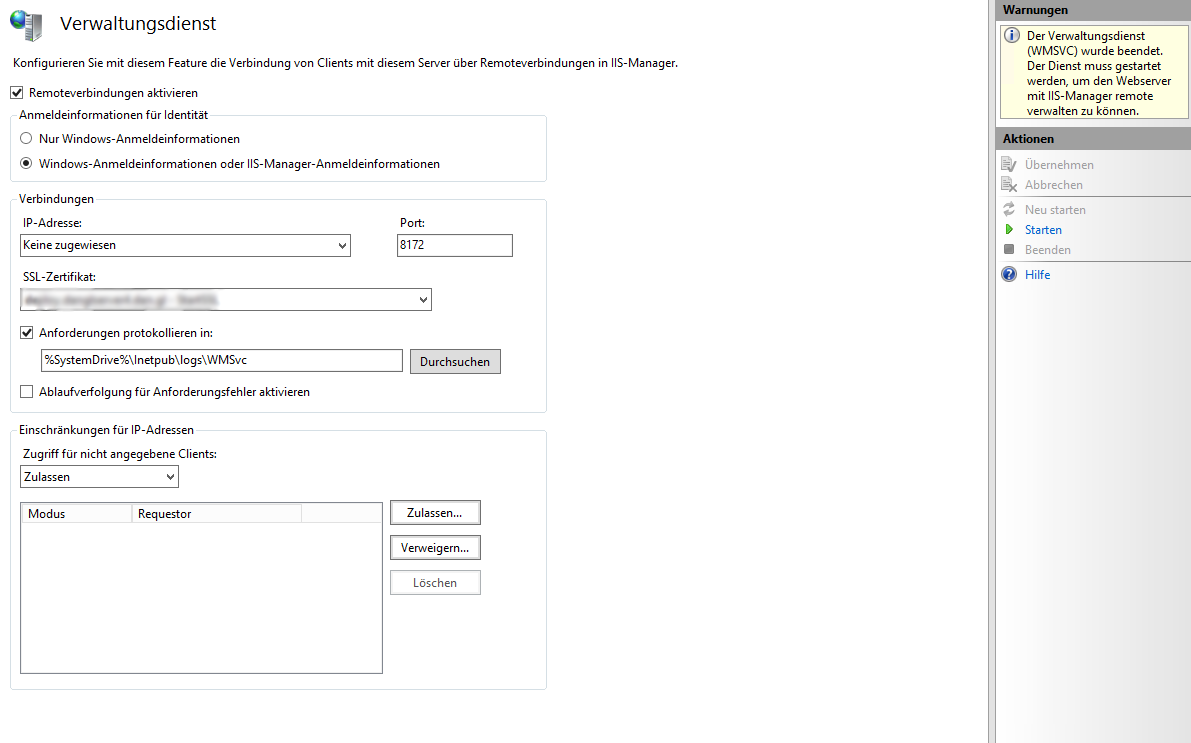
Go to the root node of your server in the IIS management application and select Management Service in the Management category. Here, click on stop on the right action menu to stop the service (you can’t change its settings when it’s running) and then simply select the SSL certificate you want to use. It’s got a self-signed default certificate, you can go with that, too, but then you’d have to export it out of the IIS certification store to be able to import it on your clients. When you’re done, just click on start in the action menu and you’re good to go.
Tip: If you've got an SSL certificate for any website, you can use that, too. There’s no rule that says which DNS names you can use for your deployment service! It’s running on Port 8172 (or any other port that you can specify), so it doesn't interfere with any web sites.
Error “User not authorized for content path” in Web Deploy
When performing the Web Deploy operation, you might get a response stating that the user [is] not authorized for content path, even though the actual folder permissions are present and set correctly. To fix that, perform the following steps:
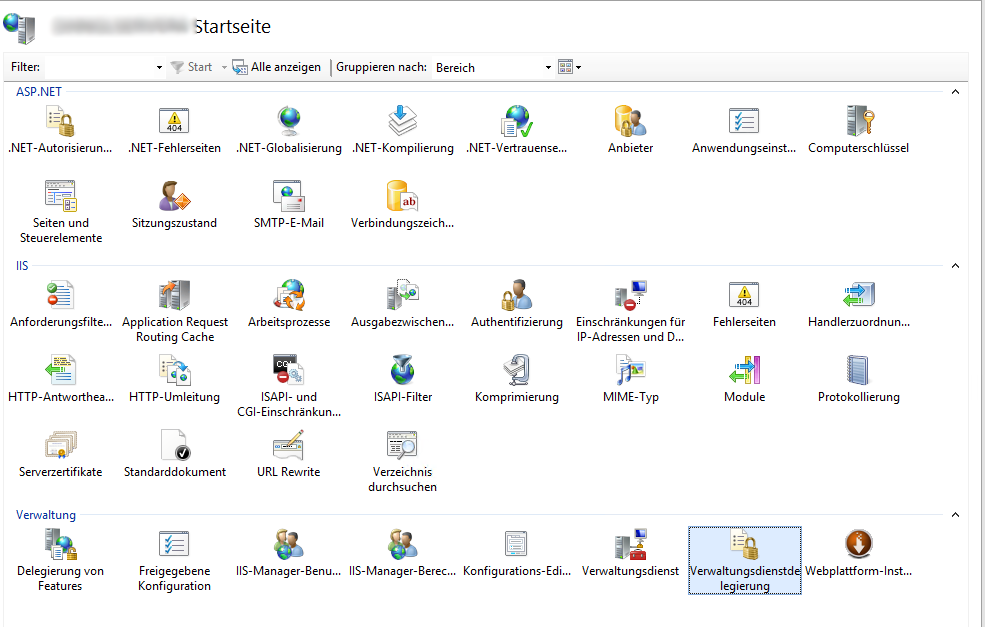
Go in IIS Manager to the server node and enter the configuration for Management Services Delegation.
In the applet, select Add rule on the action menu on the right side, select Deploy Applications with content and click on OK.
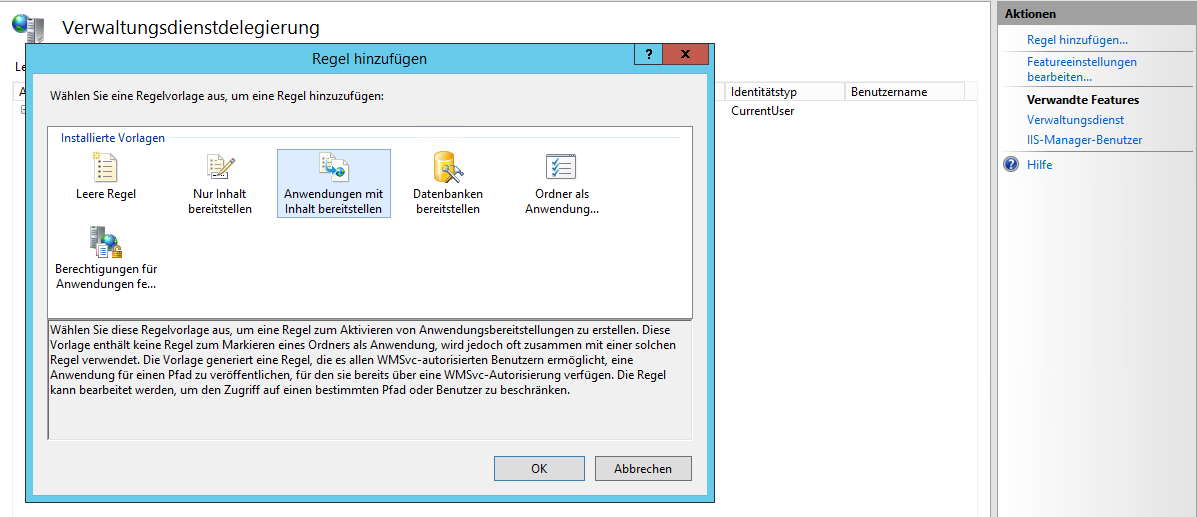
Go with the standard settings here and create the rule. Now it should be visible in the Management Services Delegation menu. Right click the rule (it should be named contentPath, iisApp and select Add User. Then just specify the user you want to grant deployment rights. Be careful not to forget the domain identifier or the local computer name for a local account, e.g. LocalServer\DeploymentUser.
After that, go back to the server root node, enter Management Service and select Restart in the action menu. Now you should be good to go!
There might be other issues, like ERROR_USER_NOT_AUTHORIZED_FOR_SETACL. As far as I know, when you install Web Deploy, those rules should somehow be created automatically for non-administrator users, but they never were in any of my installs. To solve this, just modify the rule that was just created and append the missing privilege, e.g. append , setAcl (don't forget the comma separator) to resolve permissions regarding the setAcl command.
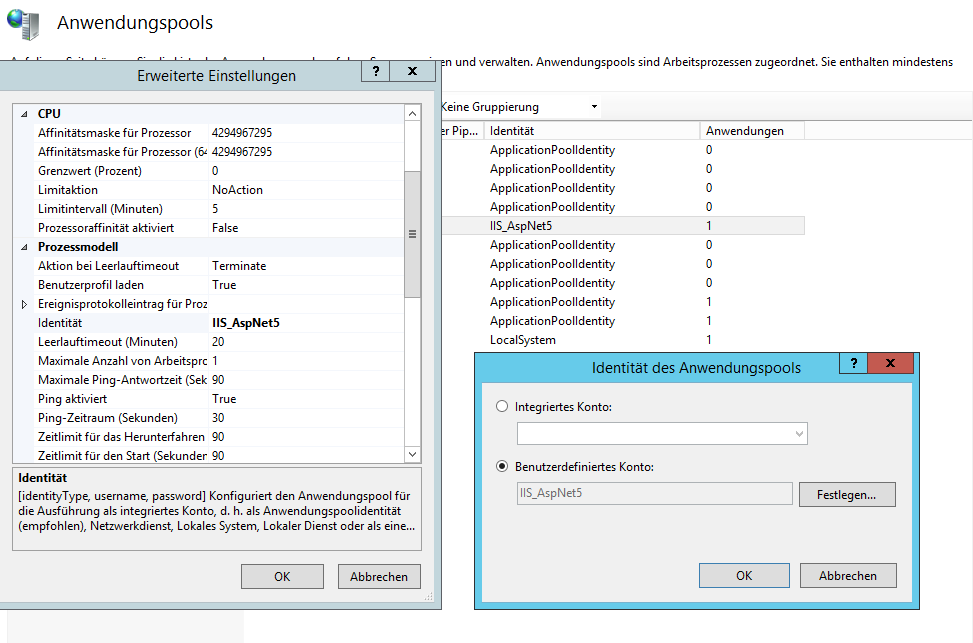
Creating an IIS Apppool with a Windows Account
There are use scenarios where you want a dedicated user account to run a specific apppool or website. For example, having database access configured via the Windows Login in SQL Server or in Asp.Net Core where you can use user secrets to store machine specific configuration, such as connection strings or SMTP server credentials, specifically for a project in a Windows Users context. For this to work, the IIS Website needs to run in an Apppool that runs with the user account of a local or domain user. To set this up, simply create a local user account on the server that is hosting the IIS installation and assign it to the Remote Desktop Users group so that you can log in via remote desktop if you need to.
Then, create an Appool in IIS and go to its advanced settings. Here, scroll down to Identity, chose user defined account and enter the account name and credentials. Also make sure that Load User Profile is set to True. This tells IIS to actually load the user profile for the Windows User, which is needed if you’re planning on using Asp.Net Core user secrets for storing anything that should not be in source control.