 by
by
Adding a TLS / SSL wildcard certificate to your IIS installation issued from your domain controller is pretty easy, assuming you’re having a Windows Server 2012 (R2) acting as domain controller. When the Essentials Role is installed, it automatically creates a Root Certificate Authority for your domain, so you don’t even have to set up anything special besides creating the requests for the certificates you want to use. Keep in mind that by default, only domain administrators are being automatically issued requested certificates. If the user you're logged in is not a domain administrator when you are making the certificate request, you have to manually issue it in the domain controllers certification management tool and then import it to IIS later.
Now let’s start creating the certificate: In IIS Manager, navigate to the root entry for your server and select Server Certificates.
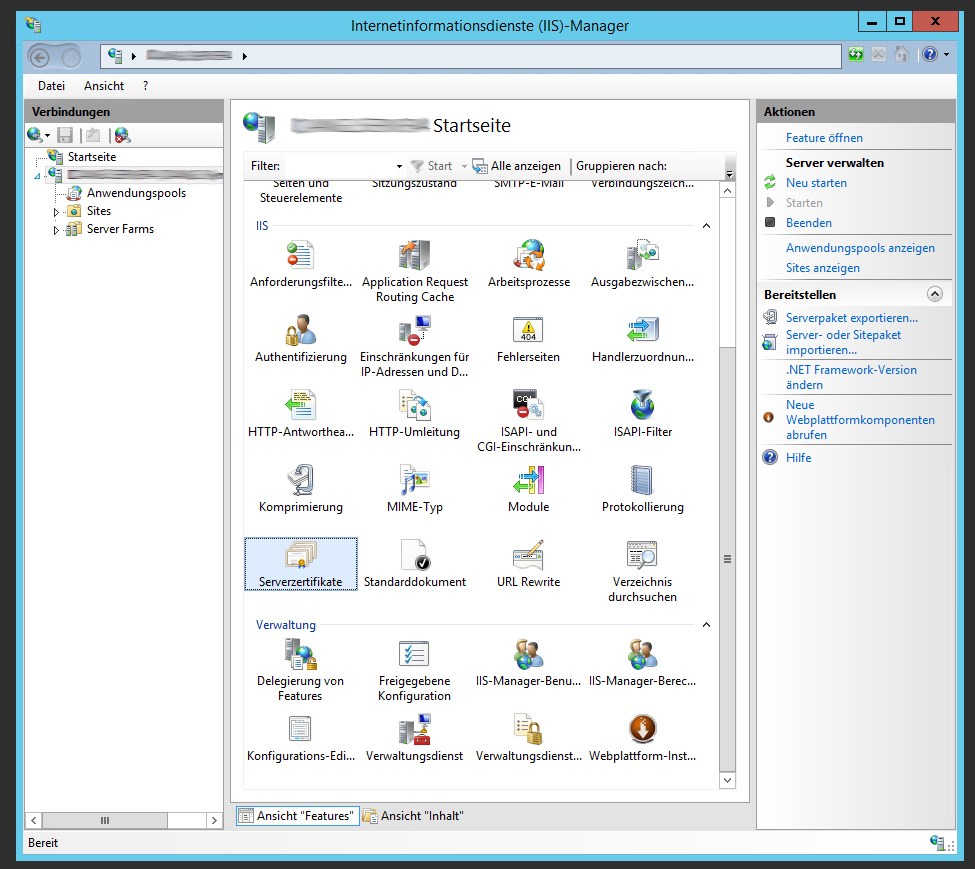
Select Create Domain Certificate on the right actions menu and the certificate creation wizard opens:
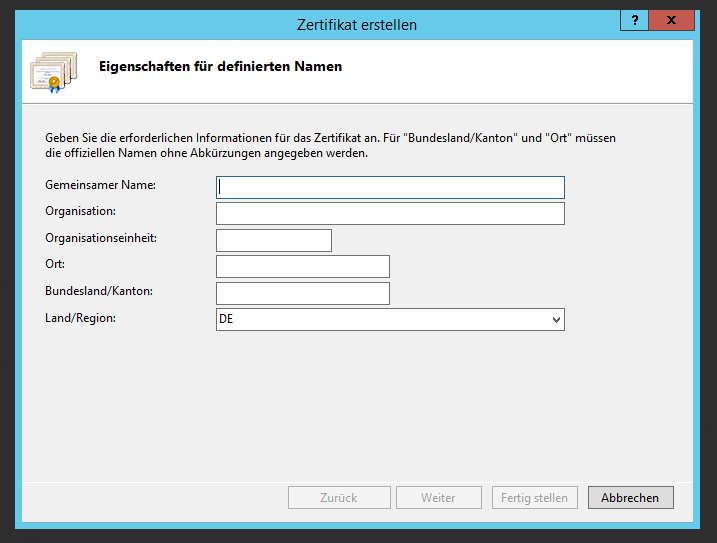
The important information here is the shared name property, where you enter the URL for which the certificate will be valid. You can use wildcards like *.yourdomain.com to have the certificate be valid for all your sub domains. Click next to continue and you’re in the second and final page of certificate request wizard:
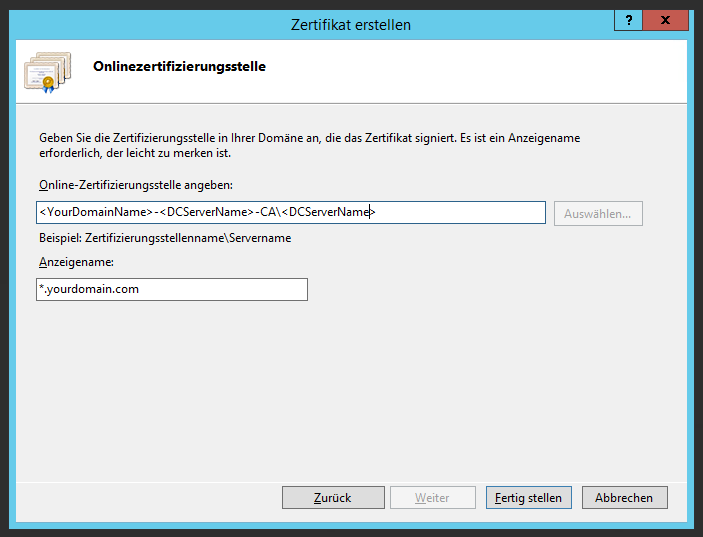
When you’re using a vanilla Server 2012 Essentials environment, your root CA will be named like <DOMAIN>-<SERVER>-CA, so for a domain called Bob.local with the server name BobServer1, the name would be BOB-BOBSERVER1-CA. Append a backslash and the name of the server (a DNS entry that resolves to the server hosting the CA environment which is usually your server’s name). If your CA is on the home network, the webserver however is on another) server not in the same subnet (for example, a hosted virtual server), you can rely on the built-in VPN connection that is set up automatically when you’re using the Essentials Connector to establish a connection to your Certificate Authority.
Finally, the display name is the name that will be given to your certificate and shown in the IIS certification overview. If you've been successful, it should look like this:
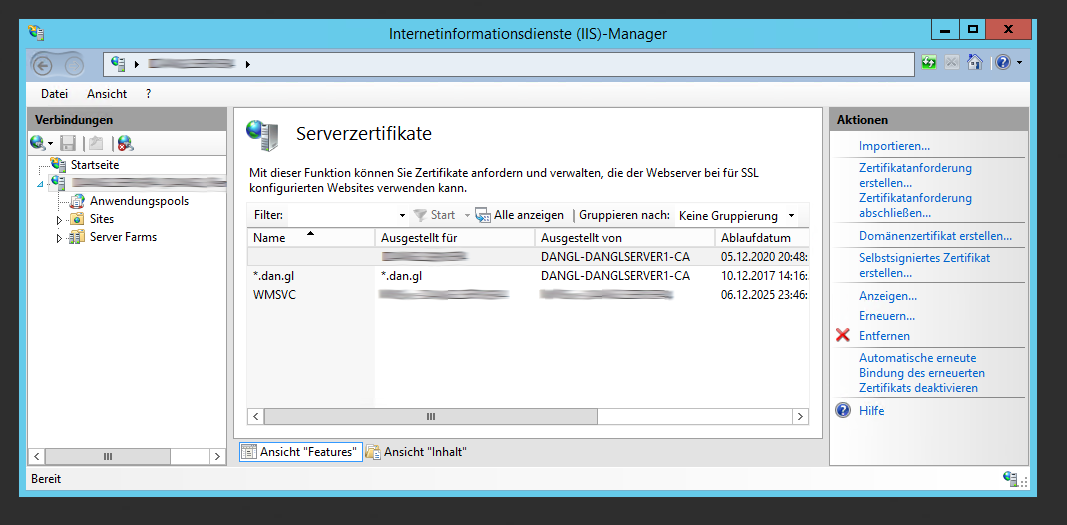
Now when you create a binding for a website using Https, you’re able to select this certificate for the connection. You can now establish trusted connections between your devices and your personal sites=)