 by
by
Lately, I've been on a business trip for a few days. While the trip itself was fine, I was annoyed about not being able to access my Amazon Prime Video content from the hotel due to geo-IP issues, namely me being in the wrong country for my account. Since I happen to have a low-cost virtual server that I'm using for a lot of stuff already, I've decided to set up a VPN on it as well. You'll find a lot of information on setting that up on "real" servers, with dedicated network cards for both internal and external connections, but the process in this post will work just fine in a single NIC setup.
In Windows Server 2012 R2 or 2016 it's a quite simple process, configuring your own VPN with NAT (Network Address Translation or just "Routing") is possible with built-in components.
Install the Routing and VPN Roles
In the Server Manager, go to Add Role & Features and select Remote Access.
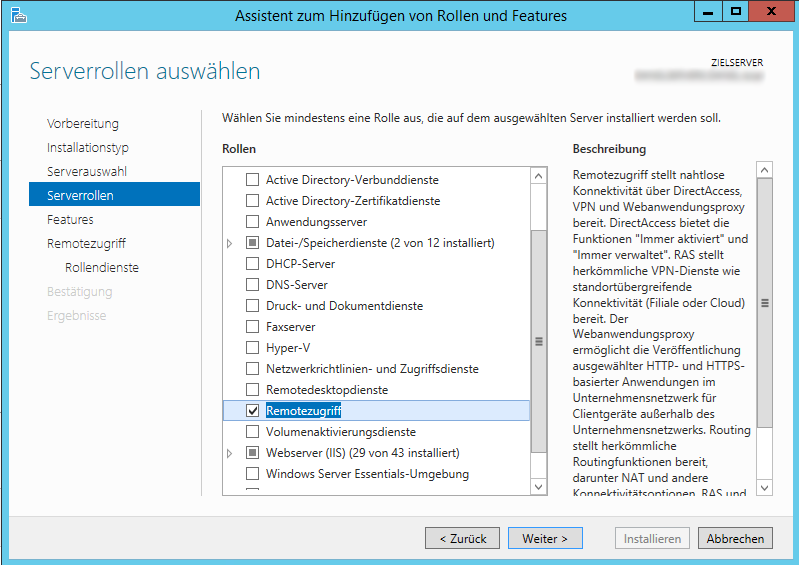
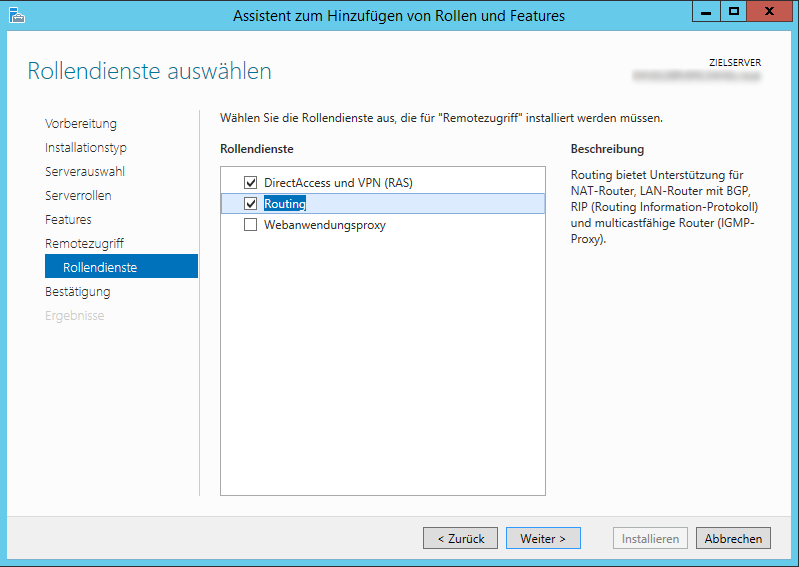
On the Role Services tab. make sure to check both DirectAccess & VPN (RAS) as well as Routing.
After the installation is complete, you can open your Routing & RAS (RRAS) management console via your installed programs.
Right-click on your server node, select Configure Routing and RAS and select Custom Configuration.
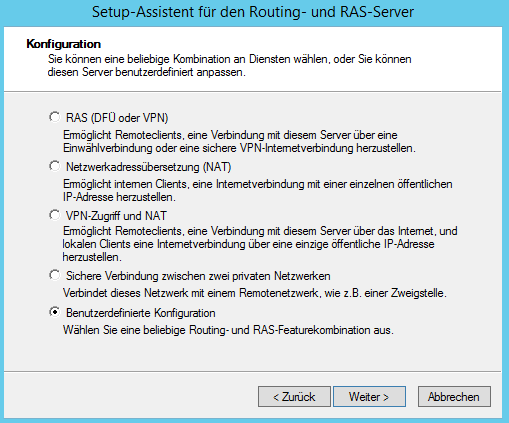
On the next screen, select both VPN (for connecting to the server) and NAT (so your VPN traffic gets routed to the internet). Click on next, approve your selection and wait until the service has started.
Configure VPN Access
There isn't a lot left to do for you, since the defaults are mostly correct for our use case here, but you'll want to configure some additional security settings and the assignment of local IPs to your connected devices.
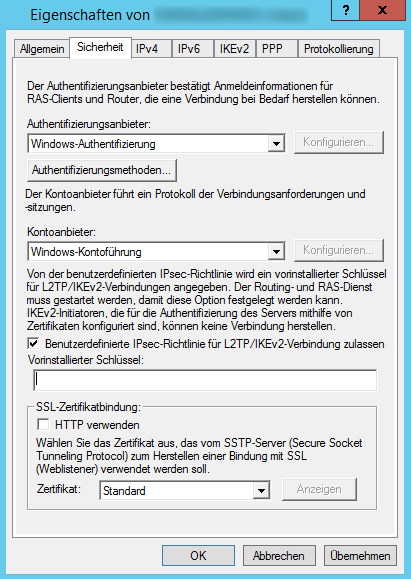
Right-click again on your server node and select Properties, then go to the Security tab, activate Allow user defined IPsec policy for L2TP/IKEv2 connections and enter a random, hard to guess key (just like your WiFi key or any password, really). You'll need that Pre Shared Key (PSK) when you manually configure clients, such as Windows machines or iOS devices.
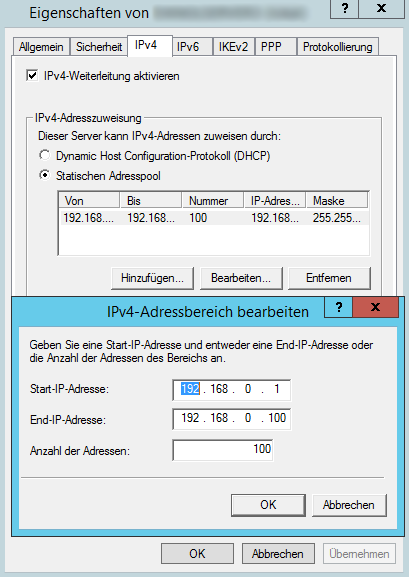
Now, switch to the IPv4 tab and tell it to use a static address pool for client connections. Ideally, you'd specify a range for private networks, like 192.168.*.* or 10.*.*.*.
After clicking OK, you'll have to select the server node again and navigate to All Tasks -> Restart in it's context menu to restart the service.
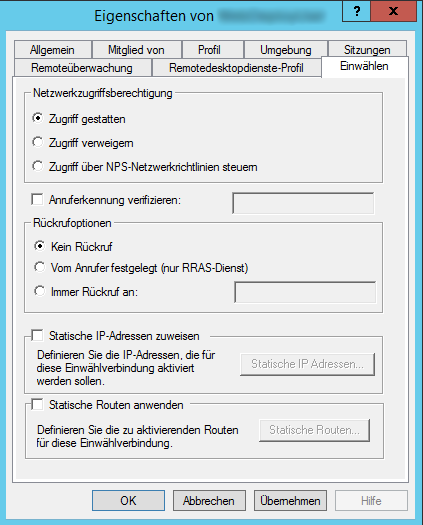
The next step is to either create a new user or modify an existing one. All you have to do is to open the users properties (which is in Computer Management -> Local Users and Groups if you're not in an Active Directory domain), switch to the Dial In tab and make sure to allow dial in network access.
Configure NAT
NAT stands for Network Address Translation and is interesting because it’s basically using a single public IP address to serve multiple clients on the inside. It's essentially what a regular router does for you at home. In a VPN setup, you not only want to connect to the internal network (Which is quite boring, being on a single virtual server somewhere on the web, actually…) but to use the server as your gateway to the internet. This has two big advantages:
- Your public IP will be your servers IP. You’ll finally be able to access your Amazon Prime Video from wherever you are!
- Traffic between you and the VPN server is encrypted. This is huge, since it means that even non-secure web traffic is encrypted till it leaves your server, so no one is able to snoop your data while using a public WiFi.
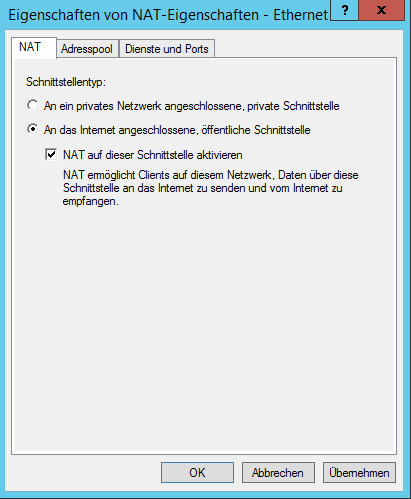
To set it up, expand the IPv4 node below your server, right-click on NAT and select New Device. Just select your public network interface and enable NAT on it:
Congratulations, you've just set up your private VPN!
Tip: If you’re experiencing troubles, check that your public network card does have some DNS servers configured. For me, my hosting company is using DHCP to assign my servers IP address and DNS servers, but I noticed that they’re not being passed on to connected clients. Just manually add some DNS servers (8.8.8.8 and 8.8.4.4, Googles public DNS servers, are good candidates) and you should be good to go.