This tutorial shows you how to work with Excel files created from the GAEB converter. I’m using the sample projects that you can download here as GAEB 90, GAEB 2000 or GAEB XML.
Structure of the File
The Excel file does have three worksheets in it with which you can calculate prices for a project or extract data from GAEB files.
There’s actually another, hidden worksheet in the file that’s used to save project related data. Please don’t change any values in that, otherwise it can’t be converted back to GAEB
The Overview Worksheet
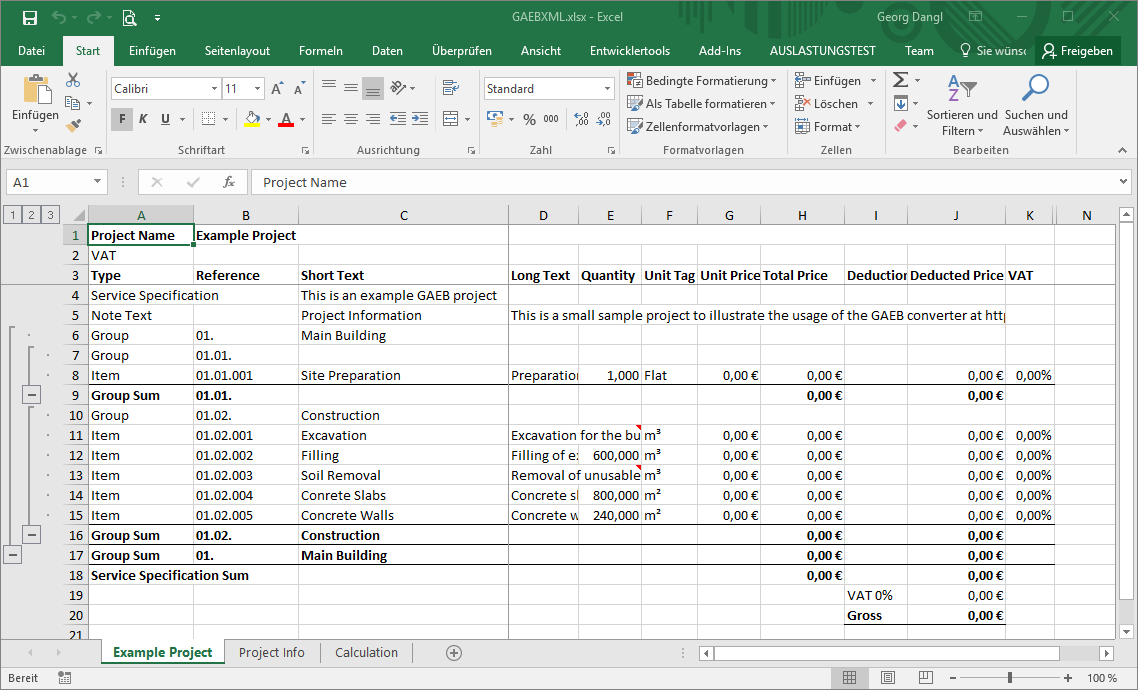
The Overview Worksheet contains the core of the service specification. It’s got a list of all the elements in the file (along their properties such as price, quantity and descriptions), has sums for all groups and calculates the total price. You can use the buttons on the left to collapse or expand groups to adjust your view of the project.
The Project Information Worksheet
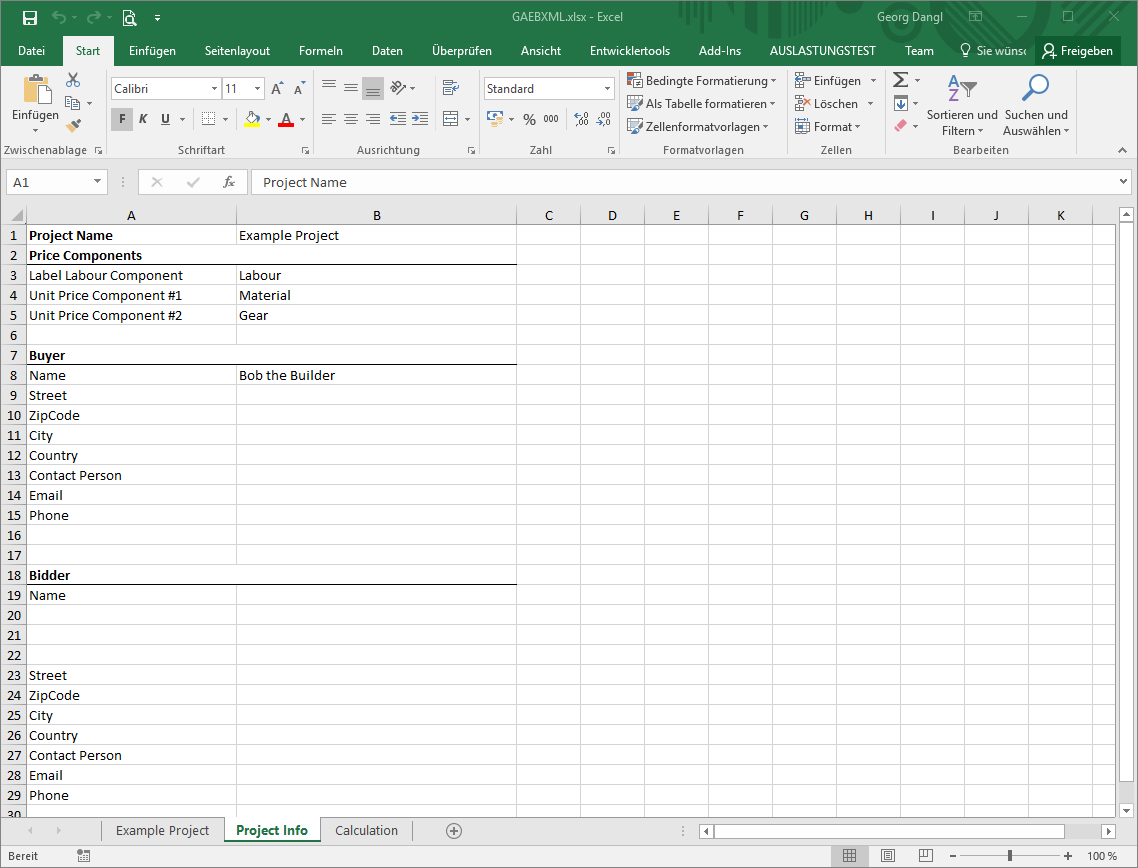
The Project Information Worksheet contains basically two types of information:
- Price components, e.g. the names of the price components used in a project like “Material”, “Gear” or “Labour”
- Contact information about the buyer and the bidder in the project
The Calculation Worksheet
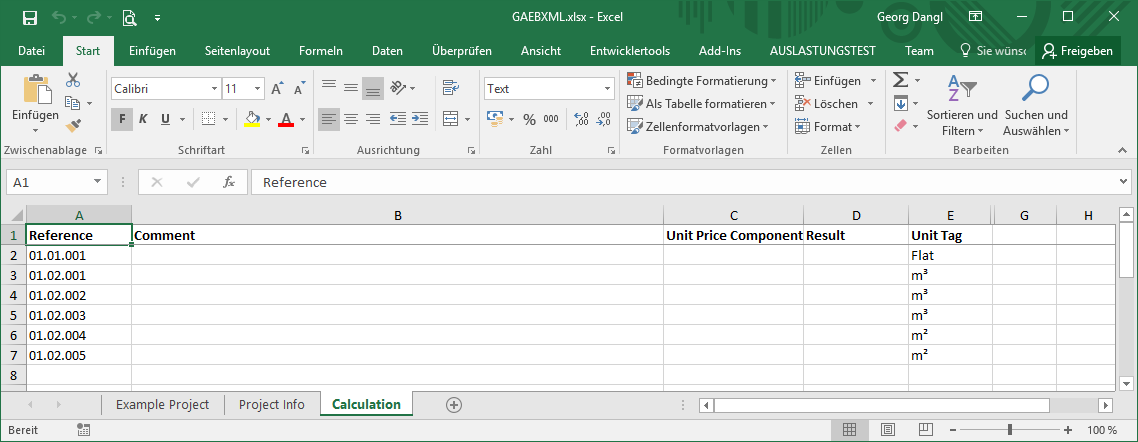
The Calculation Sheet is used to calculate prices. You can also write your prices directly into the overview, but here you’ve got a chance for a bit more structure.
Working with the File
Adding Information about Yourself
When you work with GAEB, it’s often required that you input your contact details into the GAEB file itself. This is to make it easy for architects and building owners to read your data and compare your offer to your competitors. To do that, simple enter your data in the section for Bidder in the Project Information Worksheet.
Here's an example input:
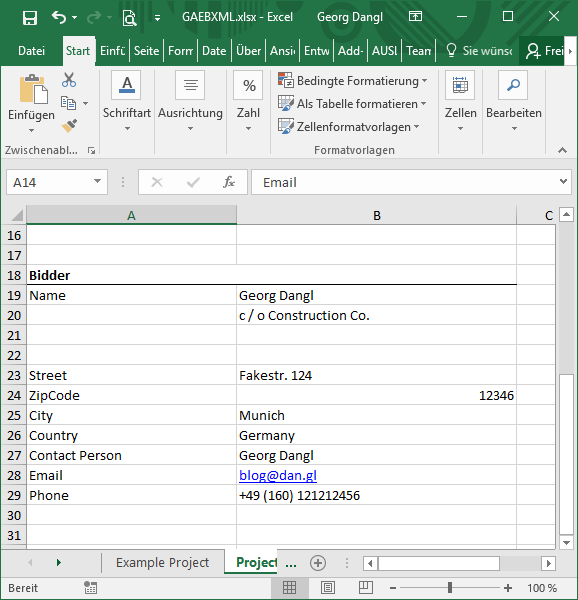
Which would look like this in a GAEB file:
<CTR>
  <Address>
    <Name1>Georg Dangl</Name1>
    <Name2>c / o Construction Co.</Name2>
    <Street>Fakestr. 124</Street>
    <PCode>12346</PCode>
    <City>Munich</City>
    <Country>Germany</Country>
    <Contact>Georg Dangl</Contact>
    <Phone>+49 (160) 121212456</Phone>
    <Email>[email protected]</Email>
  </Address>
</CTR>
Calculating Prices
You have two options to calculate and input your prices in the file:
- Use the Calculation Worksheet where you can do a structured and precise calculation
- Input the resulting unit price directly into the Overview Worksheet
Here, I’ll show you how to do a detailed calculation:
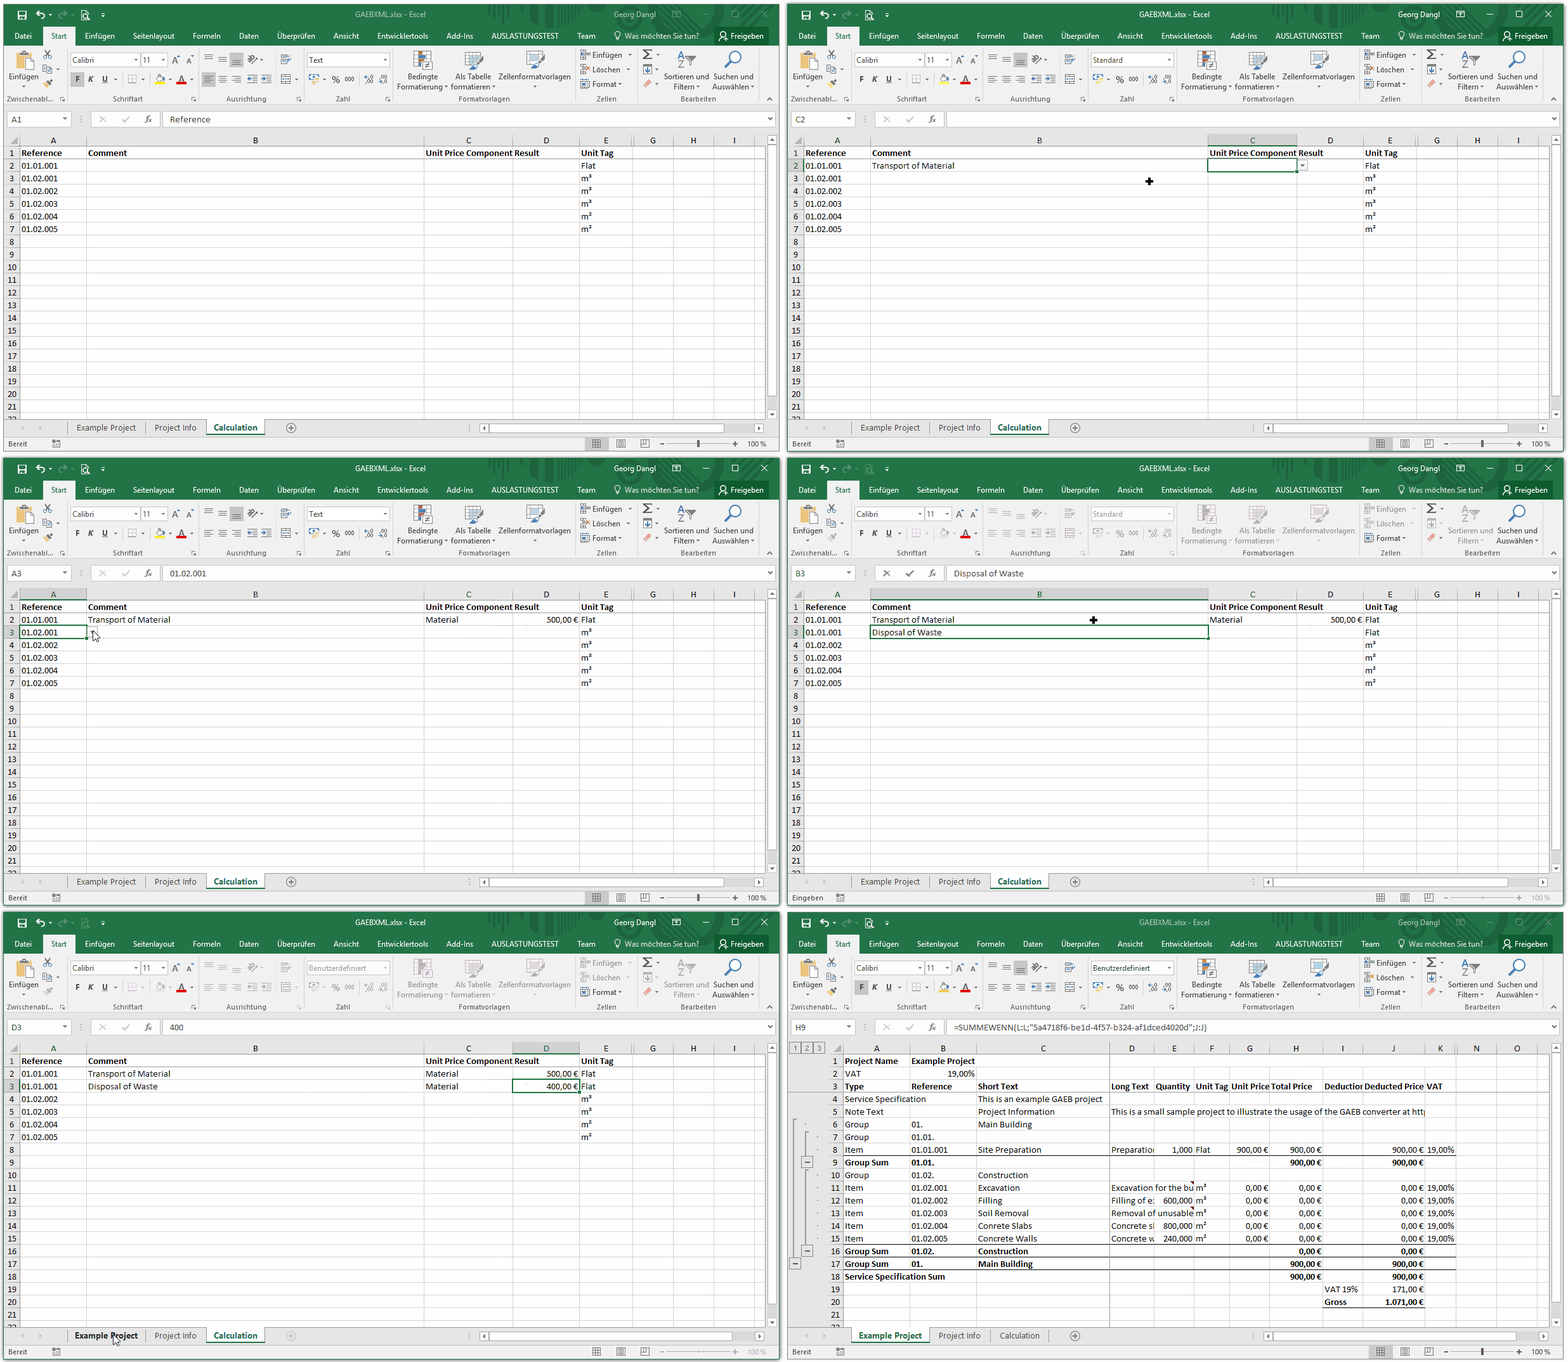
The following happens in this clip:
- Position 01.01.001 is getting a calculation entry for “Transport of Material” with a value of 500.- on the price component “Material”.
- The same Position needs another price component, so I just select the appropriate position reference in Column A and enter another calculation part.
- After switching back to the Project Overview, we see that the unit price for position 01.01.001 was updated to 900.- € and so was its parent group and the total price.
Tip: Since this is Excel, you are free to use formulas instead of fixed values when you’re calculating prices.
Setting Tax Rates
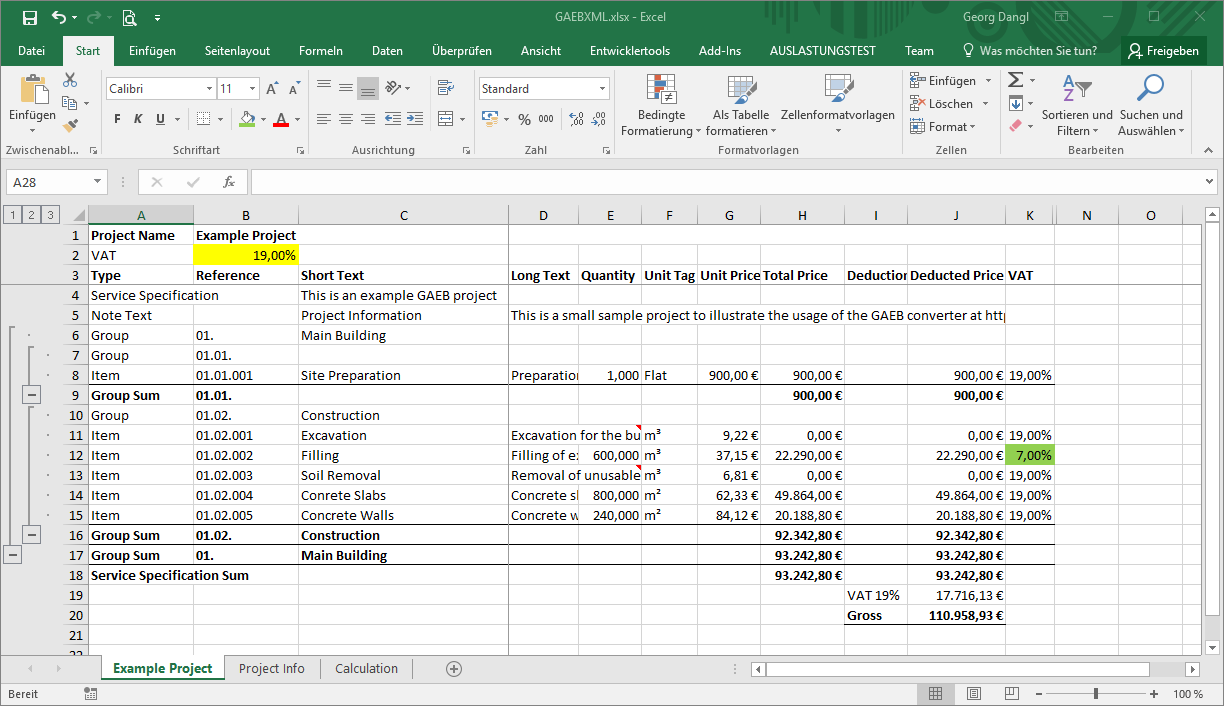
For a complete offer, you often have to include the tax rates suitable for the project. The above picture shows you (marked yellow) where to enter the overall tax rate. Additionally, you can set custom tax rates for specific items (marked green).
In Germany, Water used on a construction site usually has a reduced tax rate of 7%
Supplying Quantities where Demanded
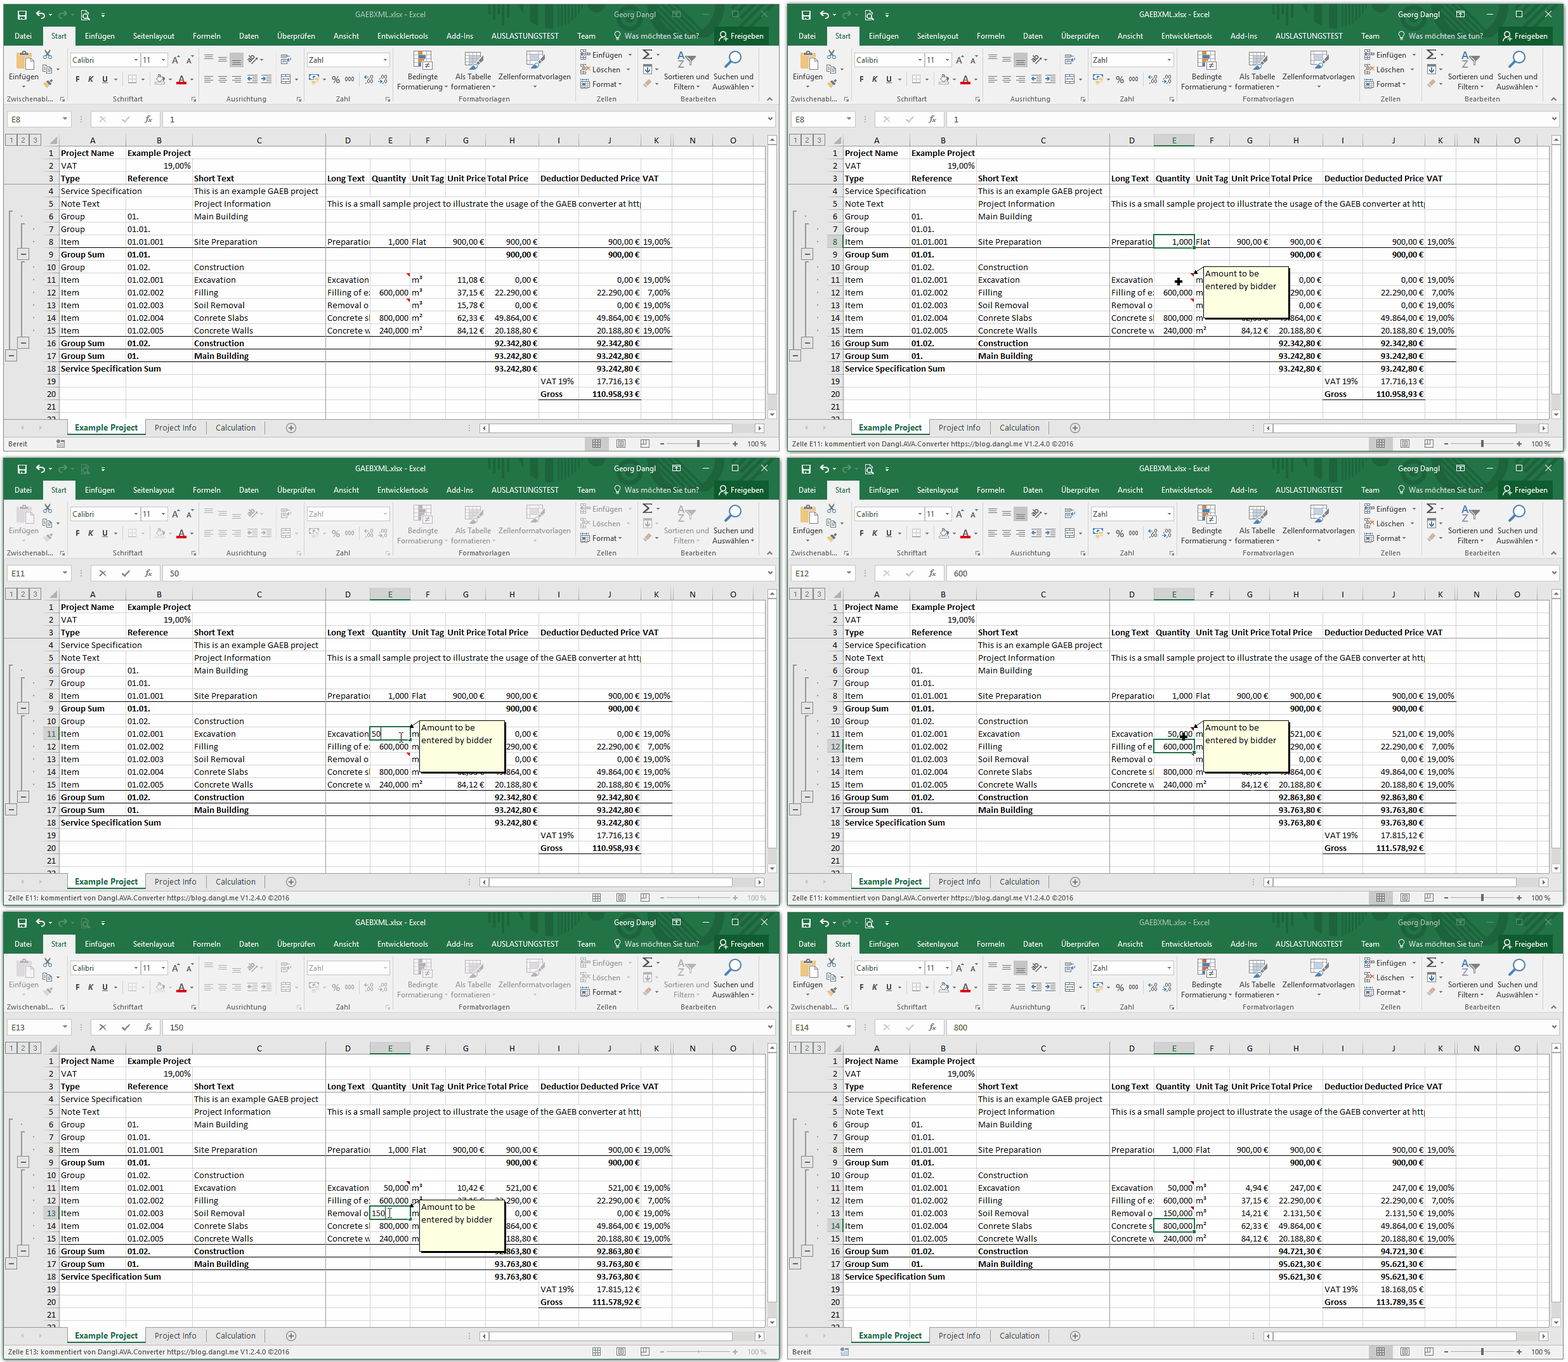
Sometimes, it’s up to the bidder to offer a quantity for a position. This may be used when the size of a necessary excavation depends on the machines that are used, but it nevertheless forces the bidder to supply the data when submitting an offer. Quantities that are required to be entered are marked with a comment, indicated by a small red triangle in the corner in the Overview Worksheets quantity column (E). You just have to enter the value in the Overview Worksheet and then you’re good to go.
Offering Deductions
If you’re feeling generous, you can enter percentages of deductions in column I for positions, groups as well as the whole service specification. The total price will then be the deducted price.
Converting the File Back to GAEB
When you've entered all your data and the project is ready, you can convert the file back again to a GAEB project. To do that, use the GAEB converter again, upload your Excel file and select one of the GAEB formats as output target. Additionally, you should chose to transform to exchange phase 84 (offer), so the file can easily be read by whomever you're sending it to. You can read the documentation for the GAEB converter here.
 by
by